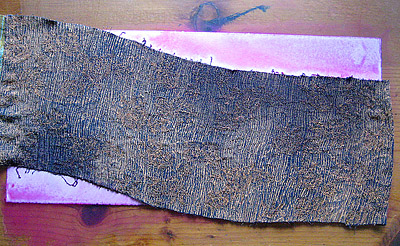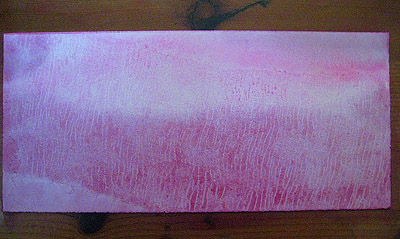
I know this probably looks like laundry day at the Renaissance Faire, and to tell the truth I did buy a bolt of this gauze to make Ren Faire shirts for the family, years ago. Sewing shirts never happened, but the fabric has come in handy for other things, among them what you see here, using pieces of it to add some soft pattern to the watercolor pigment I’ve stroked onto some very wet Zerkall book paper with a fat brush. Below you can see the results of using this type of fabric; I particularly like the whorls created with twisting the wet fabric and leaving it to dry on the paper.

Below is the step-by-step process, this time using a softly draped silky fabric for softer marks. First I wet the paper very thoroughly on both sides, using a small paint roller from the hardware store to evenly spread water and relax the paper.

Then I load a fat brush with analogous colors (next to each other on the color wheel) and apply colors in bands.

I drape the fabric over the wet paper, pushing and pulling it with my fingers to make “paths.”


Even wrinkled this paper presents some interesting possibilities. It may need another layer of watercolor to make the pattern softer and more blended with the two or three colors I used.

I use some crinkled rayon strips from the bottom of a too-long skirt, which gives a result I like very much, like sound waves, or vibrations.

There are many ways to leave a pattern on a pigmented painted paper. Using cling wrap or aluminum foil are two other ways, but the lines they leave are too sharp for this project. I really wanted something watery and flowing. These pages may end up in a book having to do with rainbows, a very beautiful poem, so I want my pages to reflect the beauty of the words. There is a lot of trial and error in this, but also a lot of fun!
I will flatten these pages before working with them, by putting them gently in a very big plastic bag containing a piece or two of soaked blotter paper, until the art paper relaxes completely. Then I put the art paper between two dry pieces of blotter, with a piece of Reemay (like Pellon for you seamstresses) protecting the painted paper and preventing it from sticking to the blotter paper. Then big sheets of corrugated cardboard top and and bottom of this sandwich, more cardboard in between if I have a tall stack, and then the whole sandwich weighted evenly but not too heavily. If paper is very wet, I’ll switch out the blotter paper for dry paper, but usually I just leave it alone for a few days, depending on the ambient weather. Other things are calling me and I won’t be able to return to these pages for weeks or maybe months. But this puddling part has sure been fun, especially while the rain poured outside my window, a reflection of my process inside the studio.


Thank you so much for all of this information–so helpful! The papers are beautiful and can’t wait to see what you do with them!
Thank you for sharing your wonderful techniques! I’m seeing those stacks of fabric in my studio with new eyes!